Viz Multichannel
Version 4.1 | Published May 27, 2019 ©
Working with Playlists
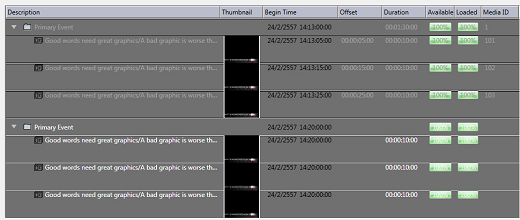
Viz Multichannel’s main task as an application is to import schedules, and consequently create, update and execute programming playlists. A playlist is composed of primary events (programs), which in turn can contain associated secondary events (pages and actions).
Playlists can be created as a continuous playlist or as a playlist per broadcast day. When creating a continuous playlist you cannot add playlists per broadcast day, and conversely.
Each new broadcast day playlist will have a different date, regardless of the day you created it on. For example, if you create two playlists today, the first one will be dated today by default, and the following one will be dated tomorrow.
This section contains information on the following topics:
See Also
-
Master Control Workflow on how to activate, initialize and manually take events on air
-
Working with Actions as secondary event actions in a playlist
Import a Schedule
Viz Multichannel can import a schedule from an external source. However, there are certain parameters to configure the first time you import it.
Schedules are generally composed by the traffic departments. Many scheduling systems can create schedules with both primary events and secondary events, i.e. schedule plus associated pages. Viz Multichannel also supports user-defined rules for automatic insertion of secondary events.
Schedule file formats that can be imported as playlists are:
-
Importing from Text (*.csv, *.txt, *.vicc)
-
Importing from XML (*.xml)
-
Importing from Excel (*.xls, *.xlsx)
-
Harris ADC-100 (*.lst, *.rcv)
-
Omnibus (*.osc)
If this is the first time you are importing a schedule, you must first complete the procedures in the following sections:
To Import a Schedule
-
Select your channel
-
From the toolbar, click the Import schedule button
-
Select the file to import and click Open.
Creating a Playlist
Viz Multichannel can create a playlist based on an imported schedule, or create one manually. Note that the common and preferred way is to import schedules from scheduling systems.
To Manually Create a Playlist
-
Select your channel.
-
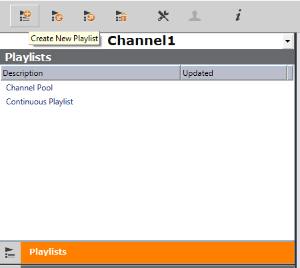
Click the Playlists button.
All existing playlists for the selected channel are displayed.
-
Click the Create New Playlist button
A new row representing the new playlist is added.
Deleting a Playlist
To Manually Delete a Playlist
-
Select your channel.
-
Click the Playlists button.
All existing playlists for the selected channel are displayed. -
Select the playlist and do one of the following:
-
Right-click the playlist item and select Delete Playlist from the context menu, or
-
Click the Delete Playlist button on the toolbar
-
-
Click Yes to confirm.
Adding Primary Events to a Playlist
To Manually Add Primary Events to a Playlist
-
Select your channel.
-
Click the Playlists button.
All existing playlists for the selected channel are displayed. -
Open your Playlist.
-
Right-click the relevant playlist and from the appearing context menu, select Add Primary Event.
Adding Secondary Events to a Playlist
Secondary events can be pages and video clips, or a combination thereof.
To Manually Add a Page to the Playlist
-
Select your channel.
-
Click the Playlists button.
All existing playlists for the selected channel are displayed. -
Open your playlist.
-
Click the Templates and Pages or Video Clips button.
-
Drag and drop a page or video clip on top of a primary event.
Note: If you press <Alt> when dragging a page onto the playlist, the resulting secondary event will be associated by reference only to the original page.
-
The secondary event appears below the primary event. If there are several secondary events, they will be sorted according to their offsets.
-
The most important fields to edit are generally the offset and Duration fields.
Note: If a field is not editable you can check the relevant column’s Edit Events check-box seen in the mapping table.
-
See Also
Deleting Events from a Playlist
To Manually Delete Events from a Playlist
-
Select your channel.
-
Click the Playlists button.
All existing playlists for the selected channel are displayed. -
Open your playlist.
-
In the playlist, right-click the relevant event and select Remove from the appearing context menu.
Updating a Playlist
If there are changes to be made to a playlist, you have the following options:
-
Full Update
-
Full Update Without Event Deletion
-
Update Times.
You can schedule automatic updates in the Update Settings
Full Update
The Full Update option merges the current playlist with changes made to the schedule.
Priorities and updates of existing secondary events are determined by configurations done in the Full Update Options for Secondary Events section.
See also the Working with Rules and Resolving Conflicts sections.
Full Update Without Event Deletion
The Full Update Without Event Deletion option merges the current playlist with changes made to the schedule, without deleting existing primary events.
Update Times
The Update Times option is for imported schedules only. It is an update of primary events’ begin time, duration and offset from changes that have been made to the schedule. Any primary event additions or deletions are ignored. Only the times are updated.
Exporting a Playlist
To Export a Playlist
-
Select your channel.
-
Click the Playlists button.
All existing playlists for the selected channel are displayed. -
Open your playlist.
-
From the toolbar, click the Export Playlist button.
If the original playlist was LST, then the exported playlist can be merged with the original file.
For all other formats, you are prompted to save the file and assign a name in the relevant format.
Playlist State Definitions
The playlist currently has 6 states for elements that reside in it. Each of these states use color on the playlist elements to give a quick visual indication of their state:
-
Normal state – The state of an un-played element. Elements are shown in a White text.
-
Played state – The state of an element where it has been played out at least once. Elements in are shown in a Gray text.

-
Cue state – The state of an element in a group has been called by MSE, to prepare for playing. These elements are shown in Yellow.
-
Pre-queue state – The state of a next element that will start playing within 5 seconds. Elements are shown in Orange.

-
Playing state – The state of an element which are currently playing. These elements are shown in Green color. Cue state of the playlist that are activated by an external trigger have a yellow arrow in front of its element, otherwise the playing state has a green arrow in front. External triggering can for example be a VDCP-signal from the automation system

-
Error state – The state of an element where it has been set incorrectly and cannot be played. Elements in error are shown in Red and will also have a tool-tip indicating what caused the error, if the error condition provides this information. Most errors do.

Playlist Errors
Playlist Errors in the playlist will most likely stop the playlist instantly or make the playlist work incorrectly. All indicated errors should therefore be treated as severe. It’s cause must be be investigated and corrective action to prevent it from happening again must be taken. Errors can occur because the playlist was set incorrectly, or the elements reside in the playlist aren’t created correctly or due to some other circumstance. Errors are separated into 6 groups as shown in the following list and one additional error type if the MAM system Viz One is enabled:
-
Timeline error:

-
Template does not exist:

-
Entry does not exist:

-
Available error for playout devices:

-
Loading error:

-
Other error types:

-
Viz One specific errors:
Viz One Error is an error related to an asset storage which has a specific detail of the solution in the tooltip.
